How Myofascial Release Can Improve Your Flexibility
Are you spending hours stretching in the studio but still not seeing any improvements in your penché? It’s possible that it’s not your muscles restricting you, but your fascia. Understanding how fascia contributes to movement—and restriction—in the body can help dancers improve flexibility and potentially reduce pain.
What Is Fascia?
“Fascia is the main connective tissue in the body,” says Amanda Oswald, a myofascial release specialist who runs Pain Care Clinic in the UK. “It wraps around and through all structures, including muscles, nerves, blood vessels, bones, joints and organs.”
What Is Myofascial Release?
A bodywork technique that involves massaging, kneading and stretching muscles (“myo-”) and fascia, myofascial release aims to reduce the tension that results from pain or tightness in the body. “Unlike hands-on therapies that work with the musculo-skeletal system, myofascial release works to release restrictions that have formed in the fascia,” says Oswald. “Fascia is a slow-releasing tissue, and the therapy is accordingly slow and gentle, even though it works very deeply into the body.”
Improving Flexibility
Even minor injuries that seem to heal on their own and are quickly forgotten can lead to fascial restrictions and a resulting loss of flexibility. With each restriction, the body creates compensation patterns that can result in imbalance, which progressively leads to stiffness and pain. “An ankle sprain can lead over time to imbalance in the way you use your legs, and then affects the balance of your pelvis,” says Oswald. “You may be totally unaware of these changes but wonder why you have developed tight hamstrings.” A combination of regular myofascial release treatment and self-help exercises can progressively release restrictions, with the goals of improving balance and flexibility and reducing pain.
Fascia Release Exercises
Stretching: Unlike muscle stretches that last for 20 to 30 seconds, a fascial stretch needs to last for at least 90 seconds. This is because fascia is a slower-releasing tissue. Start by holding each stretch for 90 seconds to 2 minutes, using a timer to help. (Over time, you will be able to extend the stretch for longer—up to 5 minutes or more.) You only need to do each stretch once. Go into each stretch progressively, waiting when you feel a sense of resistance until your body loosens. As fascia releases, so do all of the tissues contained within it, so you are also stretching your muscles at the same time.
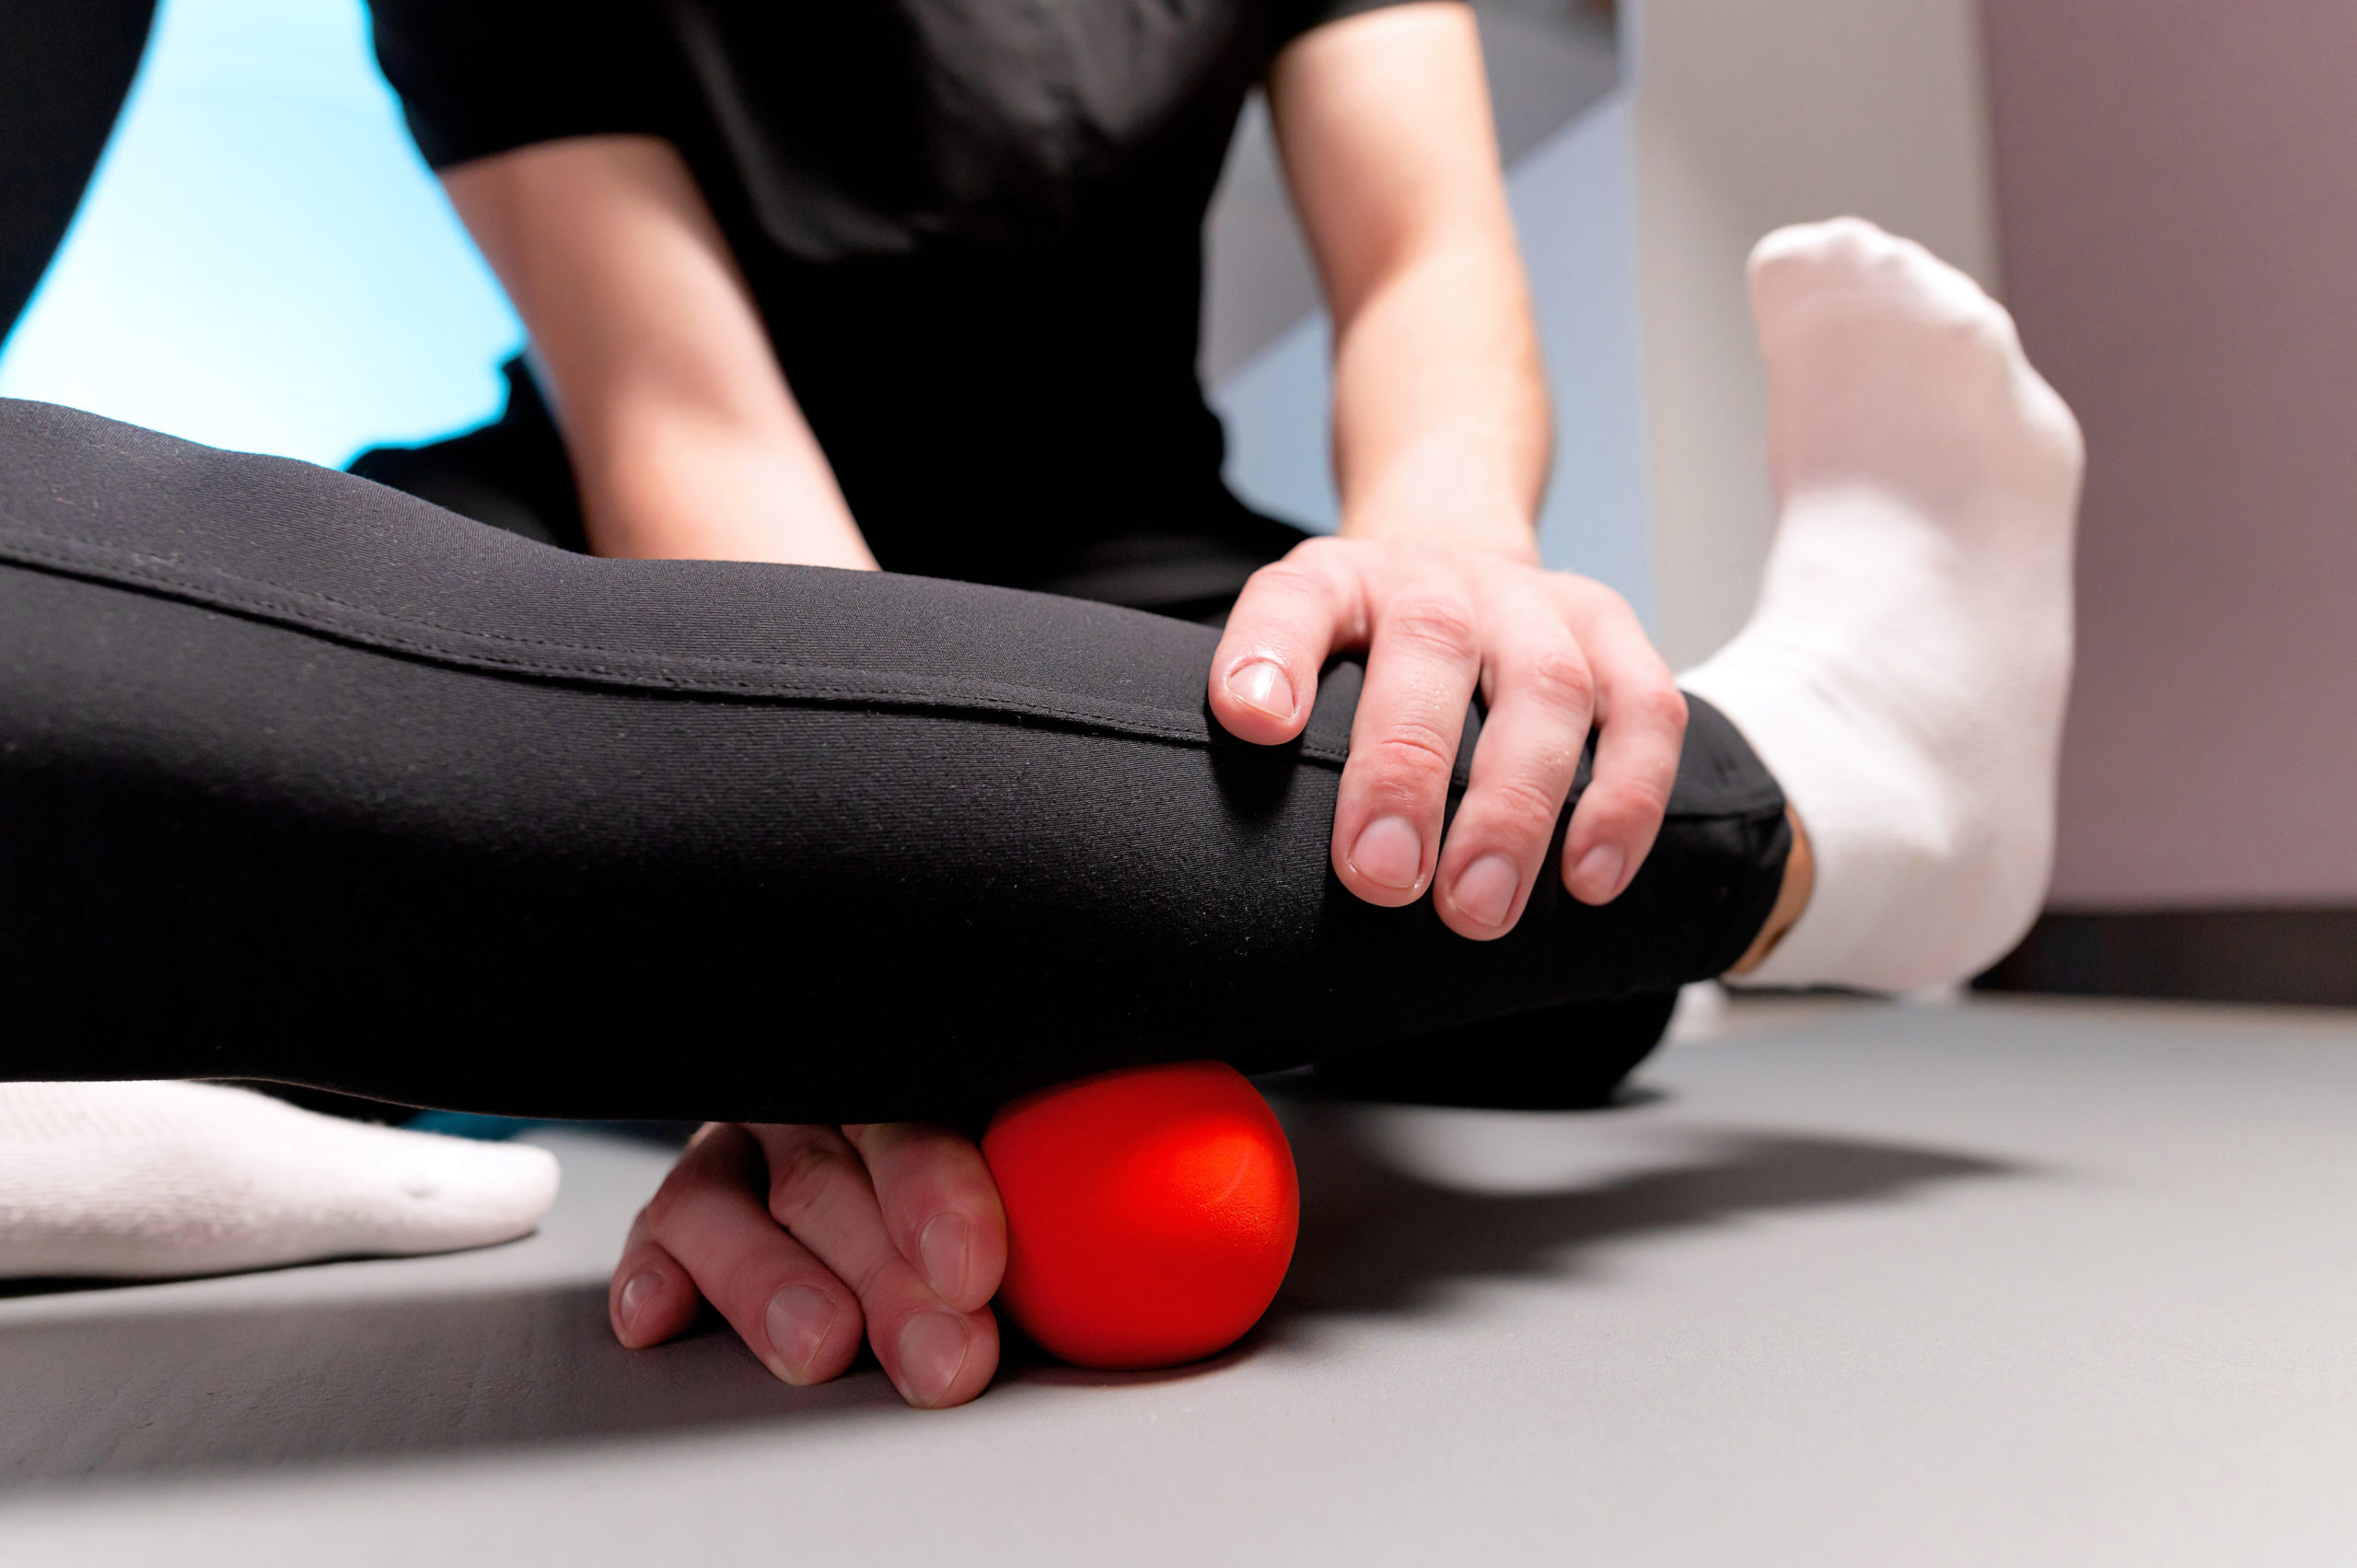
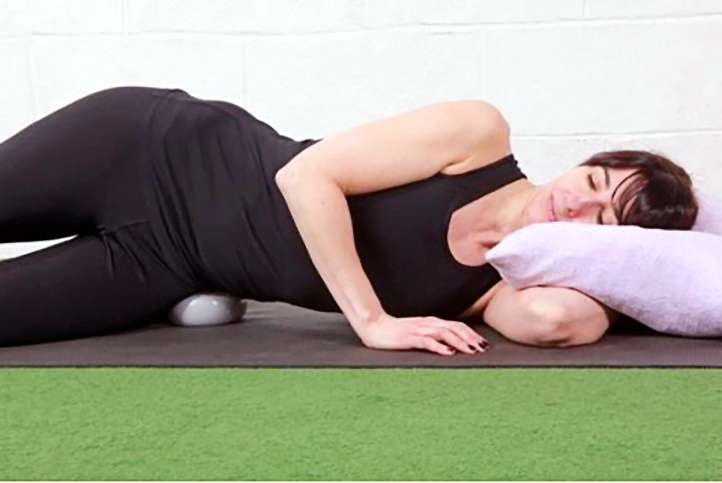
Ball Exercises: You can use an inflatable myofascial ball, a tennis ball or another type of ball. Lie or lean against the ball for at least 90 seconds to allow time for the fascia to release, using static pressure. You may feel a slight intensifying of sensations before they begin to abate. Don’t worry if you don’t feel any changes at first; if you have been in one place for at least 90 seconds, then the fascia will have started to release, but sometimes it takes a few exercises before you start to notice any difference. If any of these exercises make your symptoms worse, stop!
Try It Out
Ball on side of hips
Lie on your side on the floor or your bed and place the ball on the side of your hip. It should rest on the muscles at the top of your hip or any tender spots you find. You can also do this leaning on the ball against a wall. Repeat on other side.
Ball on calf
Sit on the floor with your legs straight out in front of you and your back supported. Place a ball under your calf and allow your leg to relax around it. You can move the ball to different spots that feel tender or sore. Repeat on other side.

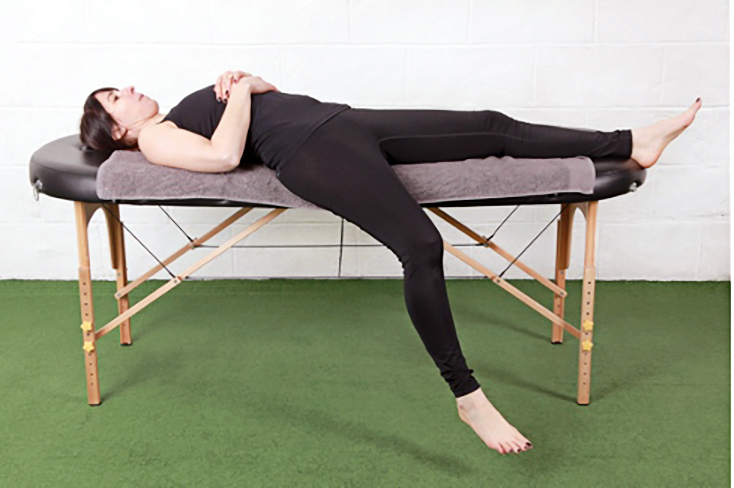
Front of hips stretch
The easiest way to do this is to lie on your bed or a sturdy table and drop one leg off—keep your leg relaxed even if your foot is touching the floor. Repeat on other side.
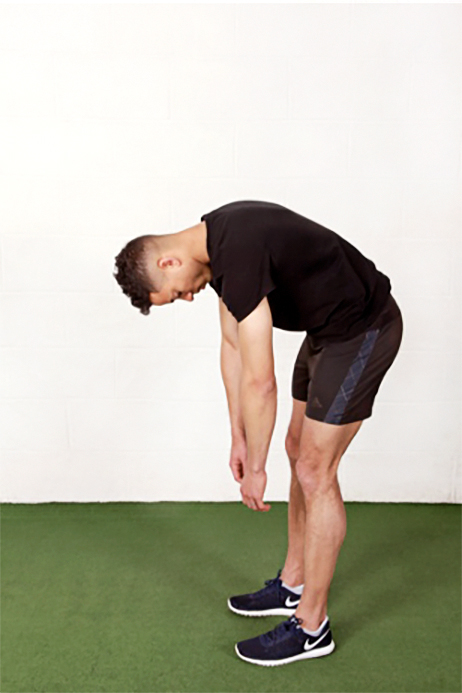
Spine roll-down
Starting at the top, tip your head forwards and imagine the vertebrae in your neck and back slowly rolling forwards and down, one at a time. Roll down as far as is comfortable and allow your body to relax. To come back up, start by stacking your bottom vertebrae one on top of another, bringing your head up last.


